Retired carpenter Frank Kowalski stared at his kitchen cabinets with frustration. Twenty years of cooking, splashing, and everyday life had left them looking dull and grimy. He’d tried every cleaner at the hardware store, but nothing seemed to cut through the stubborn film that made his once-beautiful wood look tired and worn.
Then his neighbor mentioned something his grandmother used to swear by – something so simple Frank almost laughed. “Fabric softener?” he asked, raising an eyebrow. “On cabinets?”
Three days later, Frank’s kitchen looked like it belonged in a magazine. The secret wasn’t in an expensive specialty cleaner or hours of scrubbing. It was sitting right there in his laundry room the whole time.

Why Fabric Softener Works Magic on Kitchen Cabinets
Fabric softener isn’t just for making your towels fluffy. This household staple contains powerful ingredients that break down grease, remove buildup, and leave surfaces with a protective shine that repels future dirt.
The key lies in fabric softener’s unique formulation. It contains surfactants that cut through grease and grime, plus conditioning agents that smooth surfaces and create a barrier against future buildup. When diluted properly, it becomes one of the most effective cabinet cleaners you’ll ever use.
Most people don’t realize that fabric softener is essentially a conditioning cleaner. It breaks down residue while leaving a protective layer that makes surfaces easier to clean next time.
— Jennifer Martinez, Professional House Cleaner

Unlike harsh chemical cleaners that can damage cabinet finishes over time, fabric softener is gentle enough for regular use. It won’t strip away protective coatings or leave behind residue that attracts more dirt.
The Simple Method That Gets Results Every Time
The beauty of this cleaning method lies in its simplicity. You don’t need special tools or complicated techniques – just fabric softener, warm water, and a few basic supplies you already have at home.
Here’s everything you need to transform your cabinets:

- 1/4 cup liquid fabric softener
- 2 cups warm water
- Spray bottle or mixing bowl
- Microfiber cloths or soft rags
- Optional: soft-bristled toothbrush for detailed areas
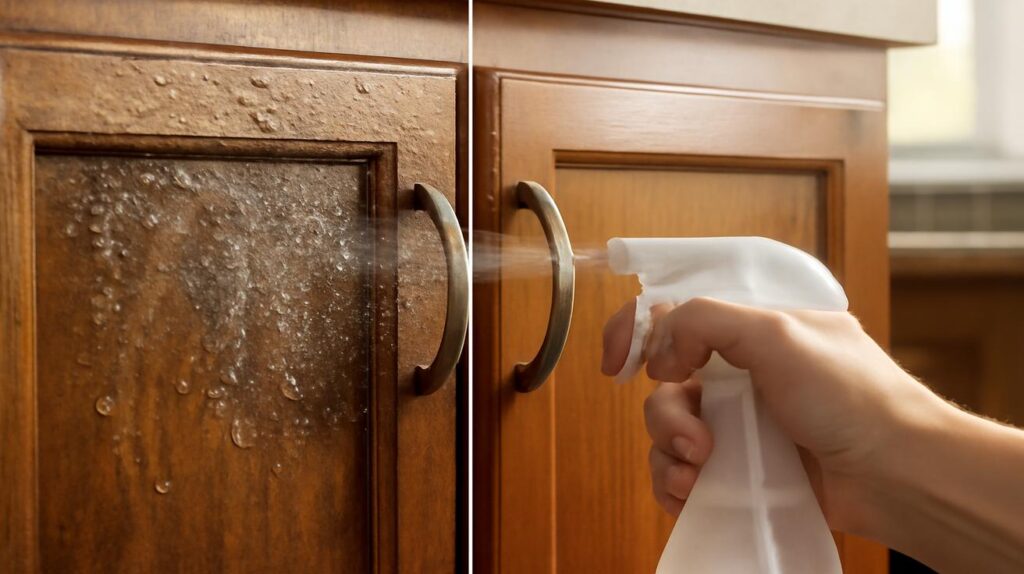
The process couldn’t be more straightforward. Mix the fabric softener with warm water in a spray bottle, or create the solution in a bowl if you prefer wiping method. The warm water helps activate the cleaning agents and makes them more effective at breaking down stubborn grime.
| Cabinet Material | Fabric Softener Ratio | Special Notes |
|---|---|---|
| Painted Wood | 1:8 ratio | Test small area first |
| Natural Wood | 1:10 ratio | Use sparingly, dry immediately |
| Laminate | 1:6 ratio | Works on most stubborn buildup |
| Metal | 1:8 ratio | Excellent for removing fingerprints |
I’ve been using this method for over a decade with my cleaning clients. The results speak for themselves – cabinets look newer and stay cleaner longer.
— Robert Chen, Residential Cleaning Specialist
Step-by-Step Cabinet Transformation Process
Start by removing everything from your cabinet surfaces. This includes decorative items, appliances, and anything else that might get in your way. You want complete access to all cabinet surfaces for the best results.
Apply your fabric softener solution using either the spray method or a damp cloth. Work in small sections, starting from the top and working your way down. This prevents drips from landing on areas you’ve already cleaned.
Let the solution sit for about 30 seconds on heavily soiled areas. This gives the surfactants time to break down grease and grime. For everyday cleaning, you can wipe immediately.
Use a clean, damp cloth to wipe away the solution and loosened dirt. Follow up with a dry microfiber cloth to prevent water spots and bring out that natural shine.

Pay special attention to areas around handles, hinges, and anywhere hands frequently touch. These spots tend to accumulate the most buildup and benefit from a gentle scrub with a soft-bristled brush.
Why This Method Beats Expensive Cabinet Cleaners
Commercial cabinet cleaners can cost anywhere from $8 to $25 per bottle, and many contain harsh chemicals that require special ventilation. A single bottle of fabric softener, which costs around $3, can make dozens of cleaning solutions.
The conditioning agents in fabric softener actually help protect cabinet surfaces from future damage. It’s like giving your cabinets a protective treatment every time you clean.
— Lisa Thompson, Interior Design Consultant

Beyond the cost savings, fabric softener offers several advantages over traditional cleaners:
- Leaves no streaks or residue
- Safe for most cabinet finishes
- Pleasant, subtle scent
- Creates anti-static barrier that repels dust
- Won’t damage hardware or hinges
The anti-static properties are particularly valuable in kitchens, where dust and grease particles in the air constantly settle on surfaces. By creating a barrier that repels these particles, your cabinets stay cleaner between deep cleaning sessions.
Professional Tips for Best Results
Temperature matters when mixing your solution. Warm water activates the cleaning agents more effectively than cold water, but avoid hot water which can create too much foam and make the solution harder to work with.

Always test your solution in an inconspicuous area first, especially on natural wood or antique cabinets. While fabric softener is generally safe for most finishes, older or specialty finishes may react differently.
Work quickly but thoroughly. The solution is most effective when it’s fresh, and you don’t want it sitting on surfaces long enough to potentially cause any issues with sensitive finishes.
I recommend this method to homeowners who want professional results without professional prices. It’s gentle enough for weekly use but powerful enough to handle serious buildup.
— Marcus Rodriguez, Kitchen Renovation Contractor

For cabinets that haven’t been cleaned in months or years, you might need two applications. Don’t try to tackle heavy buildup with a stronger solution – instead, repeat the process with the same gentle ratio.
Maintaining Your Newly Clean Cabinets
Once you’ve experienced the transformation fabric softener can provide, maintaining that clean look becomes much easier. The protective barrier left behind means future cleaning sessions will be quicker and more effective.
Plan to clean your cabinets with this method every 2-3 weeks for best results. High-traffic kitchens might need weekly attention, while less-used spaces can go longer between cleanings.
Between deep cleans, a simple wipe-down with a damp microfiber cloth will remove surface dust and prevent buildup from returning. The conditioning effects of the fabric softener make even basic maintenance more effective.
FAQs
Can I use any type of fabric softener for this cleaning method?
Liquid fabric softener works best, but avoid products with strong dyes that might stain light-colored cabinets.
How often should I clean my cabinets with fabric softener?
Every 2-3 weeks for regular maintenance, or weekly in high-use kitchens with lots of cooking activity.
Will this method work on greasy buildup from years of cooking?
Yes, but heavily soiled cabinets may need two applications and a bit more time for the solution to work.
Is it safe to use fabric softener around food preparation areas?
When properly diluted and rinsed, fabric softener is safe for kitchen use, but always ensure surfaces are completely dry before food contact.
Can I use this method on cabinet hardware like handles and knobs?
Absolutely – fabric softener is excellent for cleaning metal hardware and removing fingerprints without scratching.
What should I do if my cabinets look cloudy after cleaning?
This usually means residue wasn’t completely removed – go over the area again with a clean, damp cloth followed by thorough drying.


Leave a Comment